




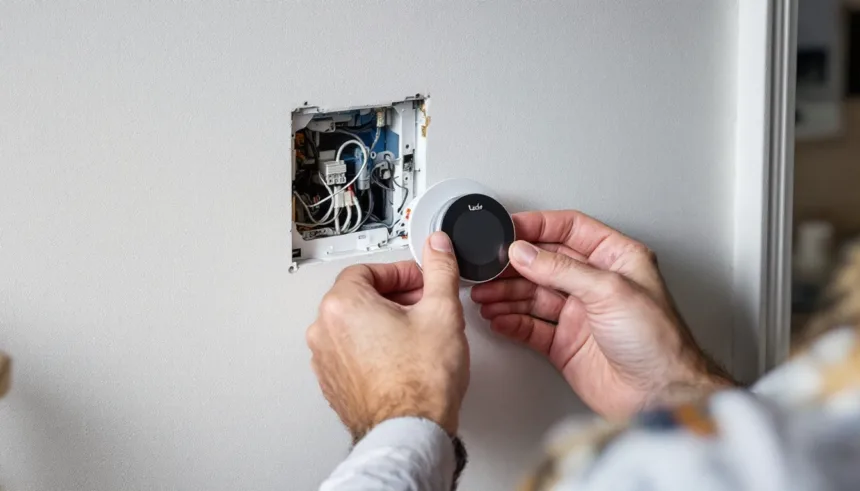
Switching from Nest to tado in the UK is a practical upgrade for homeowners seeking better room-by-room control, more granular scheduling, and tighter integration with European heating systems. While Google Nest offers solid smart-thermostat basics, tado’s geofencing, open-window detection, and multi-zone capabilities often deliver measurable comfort gains and lower gas bills, especially in homes with combi boilers or underfloor heating.
- Should you switch from Nest to tado in the UK?
- Quick checklist before you switch from Nest to tado UK
- Which tado kit to buy when replacing Nest
- Costs and savings when you move from Nest to tado
- How to physically replace a Nest thermostat with tado
- Setting up the tado app and smart features
- Smart home and voice control after switching
- Common issues when swapping Nest for tado
- Frequently Asked Questions
This guide shows you exactly how to switch from Nest to tado UK installations step by step: confirming compatibility with your boiler and wiring, safely removing your existing Nest hardware, installing the tado kit, migrating schedules and routines in the app, and understanding the real-world energy impact once you’re live. You’ll learn which tado starter kit to buy, how to handle Y-plan and S-plan systems, whether you need a professional for Part P compliance, and how to preserve or improve on the automations you built in the Nest app.
Should you switch from Nest to tado in the UK?
If you want room-by-room control and stronger support for UK-style boilers and radiators, a switch from Nest to tado UK can be worth it. tado is usually a better fit for homes with multiple radiators, mixed schedules, or people working from home, while Nest often suits smaller or open-plan spaces where one thermostat can fairly represent the whole property.
Key advantages of moving from Nest to tado in the UK include finer zoning via smart radiator valves, more flexible schedules, and generally smoother support for S-Plan/Y-Plan systems and hot-water cylinders. If your gas bills are high because some rooms are overheated just to keep one area warm, or household members have very different routines, tado’s room-level control can reduce wasted heat without sacrificing comfort.

The main downsides are the upfront cost of multiple tado devices, a more involved setup, and the loss of deep integration with other Google products. Some users also prefer Nest’s learning algorithms and polished display over tado’s more utilitarian hardware and app design. If your Nest already controls the home evenly and your bills are reasonable, the gains from switching may be modest.
As a rule of thumb, consider switching if: you have at least three radiators you’d like to control separately; some rooms regularly feel too hot or too cold; or you’re planning a wider smart-heating refresh anyway.
Related internal resource time of use tariff UK AI savings.
Quick checklist before you switch from Nest to tado UK
Before you switch from Nest to tado UK, run through this fast checklist so you know your system, wiring, and expectations match what tado can actually support.

| Item | What to confirm | Where to check | Why it matters |
|---|---|---|---|
| Heating type | Combi or system/regular boiler | Boiler label or manual | Chooses right tado kit |
| Zones & HW | Number of heating zones, hot water? | Programmer, valve box | Affects number of devices |
| Wiring | 230V vs low-voltage controls | Nest Heat Link terminals | Safe tado wiring plan |
| Internet | Stable 2.4GHz Wi-Fi, router space | Router admin page | Keeps tado online |
| Smart gear | Existing TRVs / platforms | Radiators, apps | Plan which bits migrate |
First, note your boiler and control layout. Check whether you have one or multiple heating zones, and whether hot water is controlled by Nest. Photograph your current Nest thermostat, the Heat Link wiring, and any junction boxes before you touch anything. This makes mapping each wire to the correct tado terminal far easier when you install.
Confirm that your broadband router has a free Ethernet port and is in range of where you’ll place the tado internet bridge. If you rely on Google Home routines, decide which ones must be rebuilt with tado and what will simply be dropped.
Related internal resource best energy monitoring app UK household.
Which tado kit to buy when replacing Nest
If you plan to switch from Nest to tado UK, the right starter kit depends on your boiler type and whether you control radiators room-by-room. In most British homes, you’ll be choosing between a Wireless Starter Kit (for system/regular boilers, or if your Nest Heat Link is by the boiler) and a Wired Starter Kit (for combi boilers with the thermostat wired on the wall).
| Home type | Boiler | Suggested kit | Approx cost |
|---|---|---|---|
| Flat, small house | Combi | Wired Starter Kit | £150-£200 |
| Larger house | System + tank | Wireless Starter Kit | £180-£230 |
| Multi-zone CH | Any | Kit + extra thermostats | +£100-£150/zone |
| Room-by-room control | Any | Kit + TRVs | +£50-£70/rad |
| UFH + radiators | Any | Kit + Extension/UFH box | Varies |
Combi boilers in flats and smaller houses. If your Nest thermostat is wired in place of an old wall stat and the boiler is a combi with no hot-water cylinder, a tado Wired Starter Kit is usually the direct swap. It powers from the existing wiring and controls heating only; you can add Smart Radiator Thermostats later for room-by-room schedules.
System/regular boilers with hot water tanks. If Nest currently controls both heating and hot water through a Heat Link at the boiler, a tado Wireless Starter Kit is normally the closest match.
Costs and savings when you move from Nest to tado
Swapping from Nest to tado in the UK is rarely about headline gas savings alone; it is usually a comfort and zoning upgrade with a modest energy benefit. The main cost drivers are the tado hardware bundle you choose, an optional subscription, and whether you pay an installer or reuse your Nest wiring and backplate position.
Typical upfront costs if you switch from Nest to tado UK:
| Item | Low | High | Notes |
|---|---|---|---|
| tado Starter Kit | £150 | £220 | UK deals vary |
| Extra TRVs (each) | £55 | £70 | per radiator |
| Installer labour | £80 | £200 | 1-2 hours |
| tado Auto-Assist | £25/yr | £30/yr | optional |
| Net hardware outlay | £200 | £600 | typical UK range |
Running costs are similar to Nest: both use minimal electricity and rely on your gas tariff. tado’s optional Auto-Assist adds subscription cost but removes manual confirmation taps for open-window and geofencing actions. If you already use Nest’s scheduling and occupancy features well, many UK users only see an extra 2-5% gas reduction after moving to tado, mainly from room-by-room control and more aggressive setback schedules. Poorly configured Nest systems can see closer to 10% once tado is tuned.
On a typical UK gas bill of £1,000-£1,200 per year, a 3-5% incremental saving is roughly £30-£60 a year. That puts simple payback for a modest £250 upgrade at 4-8 years, and for a whole-home TRV rollout closer to 8-12 years.
How to physically replace a Nest thermostat with tado
Before you switch from Nest to tado UK hardware, confirm what you have now: most UK homes use a Nest Heat Link by the boiler plus a separate Nest display on the wall or stand. tado will usually replace the Heat Link with a Wireless Receiver and add a wireless Smart Thermostat as the room control, or a single Wired Smart Thermostat if all control wiring already goes to the wall thermostat position.
Always work safely: turn off power to the boiler and heating controls at the fused spur and the consumer unit. Test that the boiler no longer fires and any indicator lights on the Nest Heat Link are off. Only proceed if you’re comfortable with basic wiring; otherwise stop here and book a qualified installer.
Open the Nest Heat Link cover and take clear photos of the wiring and terminals. Use small labels or masking tape to tag each core (e.g., live, neutral, call for heat, hot water). Loosen the terminal screws and remove the cables. Unscrew the Heat Link from the wall or backplate and keep any screws and wall plugs in case you can reuse the holes for the tado receiver.
Mount the tado Wireless Receiver (or Wired Smart Thermostat if you’re replacing a wired wall thermostat) in a similar location, following the mounting template.
Setting up the tado app and smart features
Once the hardware is powered and online, download the tado app (iOS or Android) and create an account with your UK address. Scan the QR code on your Internet Bridge or type the serial number to link devices. The app will auto-detect your thermostat and any radiator valves; rename each to clear room names like “Living room” or “Bedroom 2” so reports and controls stay intuitive.
Next, replace Nest’s learning schedule with explicit time blocks. In the “Schedules” section, create a simple weekday/weekend plan first: comfortable temperatures for mornings and evenings, lower setpoints overnight and while everyone is usually out. Start with small changes (1-2°C setbacks) and adjust weekly based on comfort and gas use, rather than trying to recreate Nest’s constant micro-tweaks.
Turn on geofencing under “Location-based control” so tado can lower the heat when the last phone leaves and pre-warm when someone is heading home. For multi-user households, invite others from “People” so the system tracks all phones, not just yours.
Smart home and voice control after switching
Moving from Nest to tado in the UK keeps your smart home usable, but you’ll need to redo some routines. tado works with Google Home, Amazon Alexa and Apple Home (via HomeKit), so most voice control flows can be rebuilt, even though you lose the deeper Google ecosystem links that Nest used (for example, tight integration with some Google displays and legacy Works with Nest applets).
Voice commands remain similar: you can still say “set living room to 20 degrees” or “turn heating off” via Google Assistant, Alexa or Siri. On Google Home and Alexa you add tado as a new service, then reassign rooms and devices. On Apple devices, you pair the tado bridge with HomeKit, which lets you run shortcuts such as “I’m home” that change temperature and trigger lights together.
Automations and scenes need the most work.
Common issues when swapping Nest for tado
After a switch from Nest to tado UK systems, most issues come down to wiring, settings migration, or differences in how tado manages rooms and schedules. Work through these checks before assuming the hardware is faulty.
If heating is not coming on, confirm the tado Wireless Receiver or Extension Kit is set to the correct boiler control type (on/off vs OpenTherm) in Installer Settings, and that CH demand appears in the app when you raise a room setpoint. If radiators heat but the boiler never stops, check the old Nest Heat Link wiring wasn’t left bridged at the boiler or junction box, and ensure any manual timer on the boiler is set to “always on” so tado has full control.
For hot water timing problems on UK system boilers with cylinders, enable “Hot Water” in the app, then match your old Nest schedule manually. If you now have smart TRVs, remember the cylinder stat and motorised valve still govern actual water temperature and safety cut-out; tado only decides when to call for heat. When taps run lukewarm, check the cylinder stat setting first and verify the hot water channel on the receiver clicks on at scheduled times.
Geofencing glitches usually trace back to phone settings. On each household phone, allow “Always” location access, disable aggressive battery optimisation for the tado app, and turn on “Auto-Assist” or manual Home/Away control as preferred. If presence detection is laggy, shorten “Preheat before arrival” or use manual “Away” when leaving for longer trips.
Authoritative resource: Best Smart Thermostat UK: Nest vs Hive vs Tado.
Frequently Asked Questions
Can I replace my Nest thermostat with a Tado thermostat?
You can usually switch from Nest to tado in UK homes with combi or conventional gas boilers, and many system boilers with hot-water control. A straight swap is feasible if wiring is similar and you’re confident with mains electrics.
How to replace a Nest thermostat with a tado thermostat?
• Turn off power at the boiler’s fused spur and confirm it’s dead. • Photograph your Nest Heat Link wiring and note terminal labels.
• Remove Nest thermostat and Heat Link. • Mount the tado wireless receiver or wired thermostat.
• Transfer wires using UK wiring diagrams, not colours.
Are Tado smart thermostats any good?
Tado smart thermostats work well for most UK gas-heated homes, especially when you add smart radiator valves for multi-room control. Geofencing and schedule control help cut gas use while keeping rooms comfortable.
Is there anything better than a Nest thermostat?
“Better” depends on your home. Tado can beat Nest in UK properties needing room-by-room control, radiator zoning and fine-grained schedules, especially in draughty or multi-storey houses.
Hive and Drayton Wiser are strong UK rivals with good multi-zone options.
Is tado temperature accurate?
Tado uses digital sensors in the thermostat and room devices and lets you offset readings in the app. It’s usually accurate, but UK homes with cold external walls, radiators directly under the device, or strong draughts can skew readings.
Completing the switch from Nest to tado UK setups gives you finer heating control, smarter geofencing, and often a 10-15 % reduction in gas consumption once schedules and zones are tuned. The hardware swap itself is straightforward for most combi and system-boiler homes, though complex Y-plan or multi-zone installs may warrant a Gas Safe engineer’s time.
Once live, spend a week refining room temperatures and departure triggers in the tado app; the platform’s analytics will show exactly where you’re saving. If you value per-room precision and European-style efficiency over Google-ecosystem convenience, tado delivers measurable returns that justify the upfront cost and migration effort.